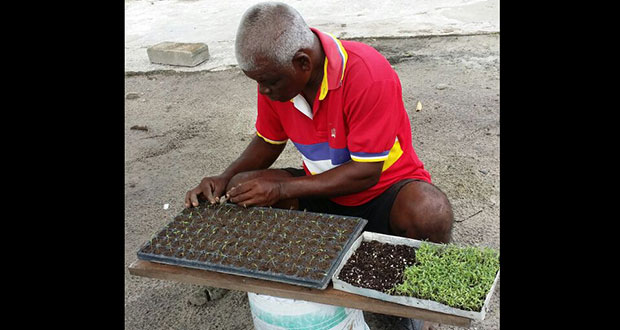
– Seedbed preparation, sowing and transplanting
Kitchen waste is truly useful. Oftentimes, persons discard vegetable and fruit seeds as waste. But, seed is an expensive commodity that should not be tossed out. So, the next time you peel your fruits and vegetables extract the seeds. This could be the start of a flourishing kitchen garden.
Vegetables are grown either by directly placing the seeds into the ground or by transplanting seedlings that were sown in seedbeds. However, fruit plants are initially produced as seedlings in nurseries. Some are grafted or budded before planting.
Irrespective of the method or propagation, it is essential that the basics of seedbed preparation, sowing and transplanting be followed closely to maximize the benefits from crop production.
Seedbed Preparation
Setting up a seedbed or nursery to begin your vegetable production is simple. This is a small area set aside for raising tender young plants for transplanting to other areas. Whether raised or flat, the seedbed should be firm allowing seeds to be in close contact with soil particles.
It is important that the seedbed is free from trash and vegetation, which usually hinder seedling growth. The seedbed should have sufficient moisture for seed germination and to support the growth of seedlings.
For small vegetable seeds, the best type of seedbed is a mixture of sand and compost or well-rotted pen manure. Too much sand dries quickly causing the soil to form a crust on the surface, which is bad for germinating seeds. Meanwhile, excess compost causes the soil to retain too much moisture, exposing the seedlings to “damping off,” a fungal disease.
The width of the seedbed is very important. If the bed is too wide it may not be possible to tend to seedlings in the middle of the bed without injury to those on the outer edge. Seed boxes or seed trays could also be used to produce the seedlings.
The seedbed/nursery should be adequately shaded to protect seedlings from wind and heavy rainfall. Evenly distributed shade reduces the intensity of the sunrays, and water loss by the crop and soil, and the amount of stress on the seedlings. The amount of shade should be reduced gradually until the time of transplanting.
It is a very good practice to sterilize the soil in the seedbed before sowing. You could either use chemicals or hot water. Boiling water poured onto the soil at a rate of one water can per square metre of bed is enough to disinfect that area. Using a jute (plant fibre) bag or any suitable material, cover the bed for a few hours. In addition, all the tools in the nursery should be cleaned so as to reduce the possibility of contamination of the soil or crop.
Sowing
Now that the seedbed/nursery is prepared the next step is sowing. Make a furrow across the width of the bed about four inches from the edge of the bed. A furrow is a long, narrow trench used especially for planting seeds or irrigation). You should repeat this at 7.5cm intervals along the length of the seedbed/seed box.
Where planting is done on a seedbed, mix the quantity of seed with about six times as much sand; then take the sand/seed mixture and let it slip slowly through the finger into the furrows. This will ensure that the seeds are not planted too close to each other. Cover the furrow lightly with the soil and press gently to ensure proper seed/soil contact.
Water the seeds immediately after sowing. Watering should be done lightly to avoid the seeds being displaced or for “damping off” to occur. The seedbed/box should be placed in a shade for protection from “dry” winds and sunlight.
When the seedlings emerge, they should be toughened. Placing them in the early morning or late afternoon sunlight does this. As the plants get older, gradual exposure to more sunlight will prepare them for the time when they will be transplanted into the field.
Transplanting
While the seedlings are growing preparation for transplanting them must be put in place. If they stay too long in the nursery their productivity will decrease. It is best to transplant plants when they are a few centimeters high and have between three and five leaves.
It is preferable to choose a cloudy day or after 16:00hrs, when the heat of the sun is less to transplant. This will expose the plants to the cool of the night to overcome the transplanting shock. At least one hour before taking out the plants, soak them thoroughly with water to cause as much soil as possible to cling to the roots.
When transporting them to the site for planting, ensure that the roots are covered and not exposed to the sun and or wind. Carefully separate the plants making sure that the roots are not damaged. Make a hole in the ground large enough to accommodate the roots and the soil adhering to the roots. Do not pour water into the holes before planting. Place the plant with soil into the hole making sure that the roots are pointing downwards.
Make the soil firm around the plant to force out any air pockets but do not press hard enough to break the roots. Water the plants immediately and use leafy twigs as shade for a day or two.
(Guyana Chronicle)


